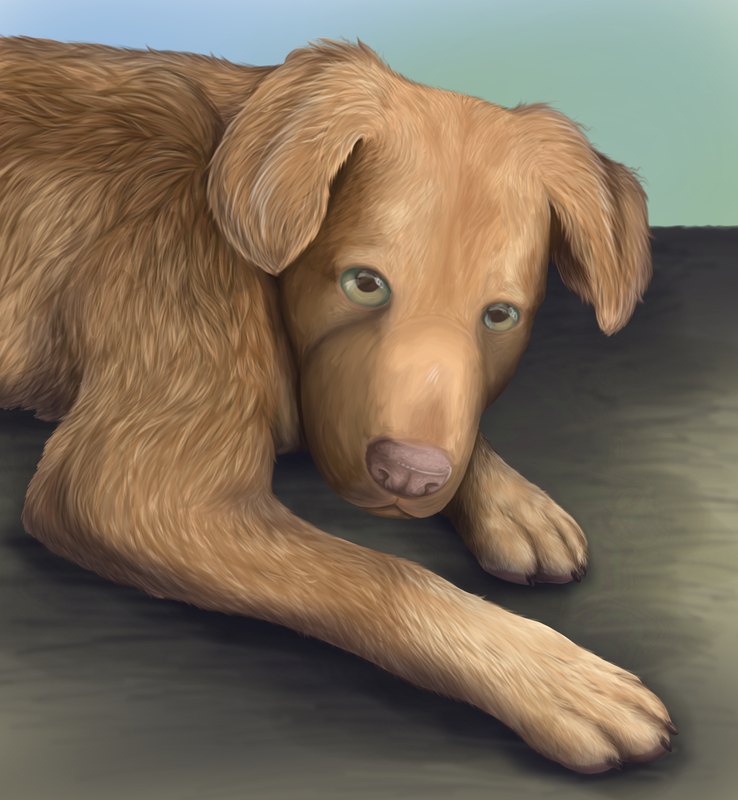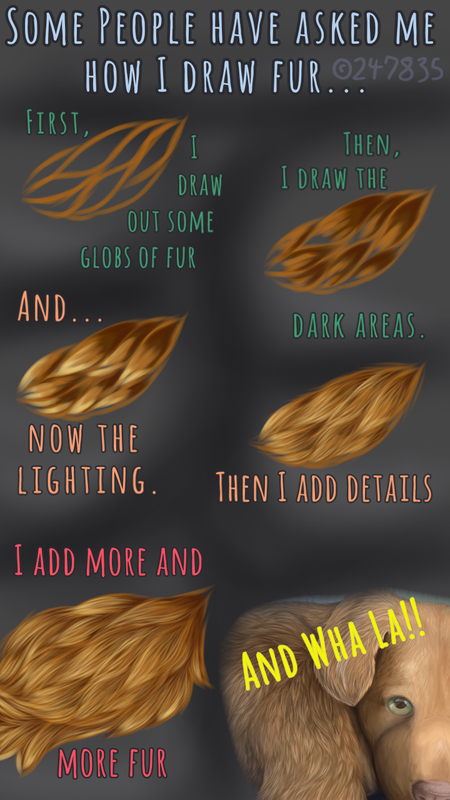
So first, how to actually create the fur...

I hope the visual makes enough sense.. incase my explanation goes awry as usual :")
Step 1: I didnt include it in the visual, buht first, you need to decide wuht colour the fur is supposed to be. If you already have that decided, then you need to get the darker and lighter shades for it. No matter wuht colour you choose... Move the colour wheel a little further from red than before, for the lighting colour. And for the shading colour/s, move it a little closer to warm colours, eg. Red. All together, you want a base colour, a shading colour, a lighting colour, and a second base/smoothing colour.
Step 2: Okay, so this would be step one in the visual. Buht Step 2! Take your first Base Colour, (or even the Shading colour for a darker look) and lay out some separated areas of fur, like in visual Guide. I would suggest making these with a bit thicker brush than that of a detailing brush.
Step 3: You always want to lay down your shading before your lighting, since the lighting is hitting the fur directly, and on top. So think of where the light would come in, and where the shadows would be produced. Shading also helps with depth perception. Where ever the fur is farther "back" or not sitting right on top, then it needs atleast some degree of shading. And since we havent begin detailing yet, feel free to make this part a rough estimation of shadows and depth. Use the same sized brush as the second step.
Step 4: Okay. *Now* you can add the rough estimation of lighting. This will be wherever the fur is closest or "highest," or wherever the light source hits. I usually use a slightly smaller brush, not by too much, even though it really makes a world of difference in my experience. You can overlap the sketch shading and lighting colors by some of the base, or secondary base, colours.
Step 5: Now for the detailing. Detailing is wuht actually pulls the look together and creates the realistic effect. For this, use a much *much* smaller brush and just continue to layer on more strokes using all four colours, and adding more "hair" to the canvas. You can cover up most of the sketch lighting using the secondary base colour, then go back over that with the lighting colour. It makes everything look great!
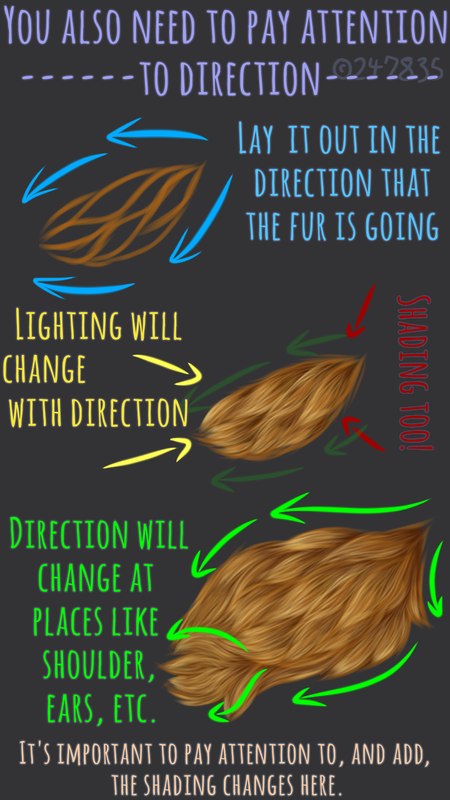
Step 6: From here, all you have to do is add more fur, all the fur, as much fur as needed *^* Create yourself a fabulous little fluffers. With the exception of also following my second guide just down below.
The direction guide doesnt really need steps, since it more self-explanatory :")
-If you do have questions, however, just comment them in this forum and I will gladly answer your questiom! ^-^

☆----------With That Being Said-----------☆
-Create something splendid!
-Have fun experimenting!
-Ask *any* questions you have about this!
-Post the artwork you create using this tutorial!
-Refer back to this tutorial at anytime!
-Link anyone to this tutorial if they need help!
-And have a swell Day! ^-^
☆All Credits go to LucidNavy (C) 247835☆


