HOW-TO: Make Animations in FireAlpaca
Animations are (obviously) very popular. Pictures that move have always fascinated us. So how does it work?
I'll show you how I make a simple forward animation like I have in my banner (without the blinking part):

What you need to remember is - Each layer on your canvas is one frame in your animation. So you'll have to make each frame individually. As daunting as that sounds, it's actually quite simple once you know what you're doing.

1 - First off, you'll need to know how layers work. If you know this already, skip ahead to step 3.
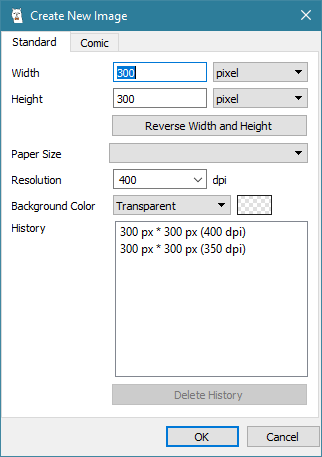
In FireAlpaca, open a new image. I'm going to make the dimensions the typical WP avatar size: 300x300 pixels. I prefer the background color to be transparent, because you can always add a background later.
In FireAlpaca, open a new image. I'm going to make the dimensions the typical WP avatar size: 300x300 pixels. I prefer the background color to be transparent, because you can always add a background later.
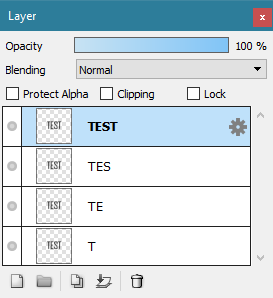
2 - Once your canvas is open, look to where your layers panel is. It should look something like this:
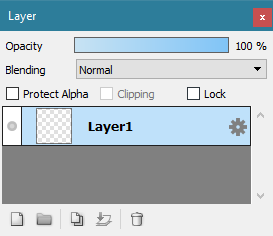
These buttons on the bottom left of your layers panel are going to be your friends. Play around with them. Make sure you know what they do. If you mess up on a layer, your whole animation will get messed up.

Going left to right:
(1) Add Layer
(2) Add Folder
(3) Duplicate Layer
(4) Merge Layer(s)
(5) Delete Layer.
Usually while I do this, my layers panel will be expanded to the full extent, meaning, I get rid of the Navigator, etc that might be on top of it so I can see what I have so far. It also makes for a lot less scrolling when you get to using lots of folders and layers. This is completely optional, but you may find it useful in future, more complex animations.
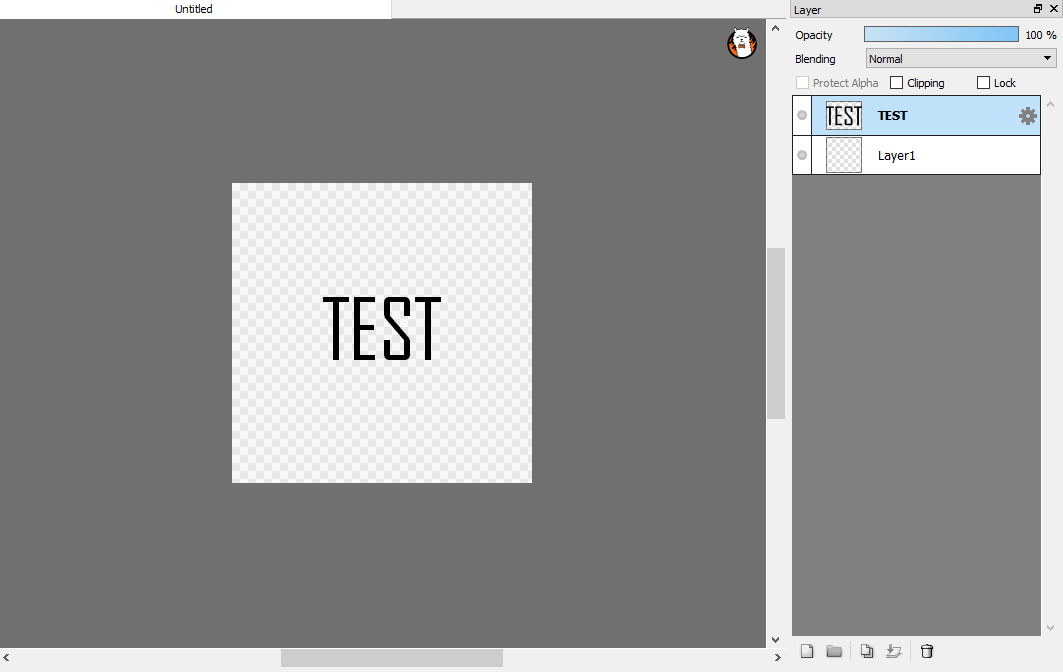
3 - We're going to be doing a simple text animation. Press "T" on your keyboard (or on the tools bar) to access the Text tool. Press somewhere on the image, then type: TEST
For aesthetics reasons, center the words in the middle of the image. This will be the skeleton you use to build your animation. Always make sure you have a skeleton; then you know where things will be going.
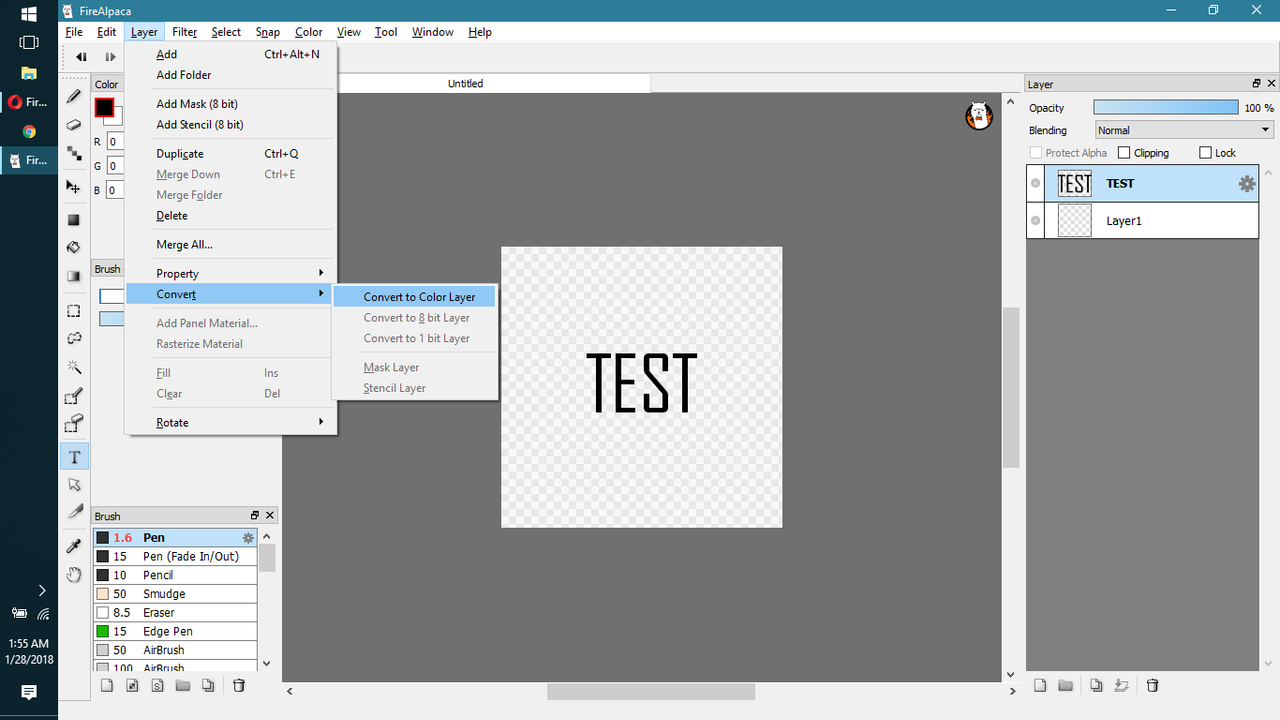
4 - Convert your TEST layer to a Color Layer.
5 - Duplicate the layer 3 times until you've got four items that say "TEST". Then rename them (double click) accordingly: "T", "TE", "TES", and "TEST". This will help you keep track of what is exactly on the image. You could also just use numbers, as long as you remember which number represents what. Make sure to keep it consistent.
6 - Now, except for the bottom most one, hide all the layers. Click the grey circles to hide the layer.
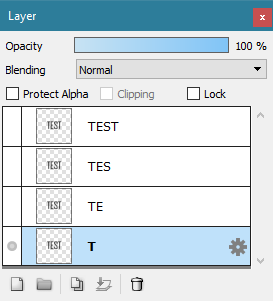
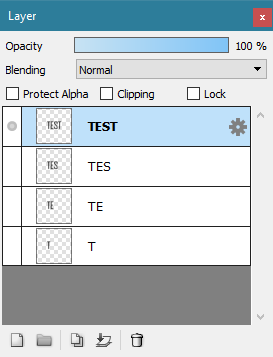
7 - Delete all the letters that are not visible in the letter name. I.e., in layer “T”, make sure what exists on the canvas is only the ""T"".

8 - Do the same for the other layers. Display only the layer you're working on. **ALSO MAKE SURE YOU’RE WORKING ON THE RIGHT LAYER**.
9 - Click on "View" - "Onion Skin Mode". Then click on "View" - "Autoplay".
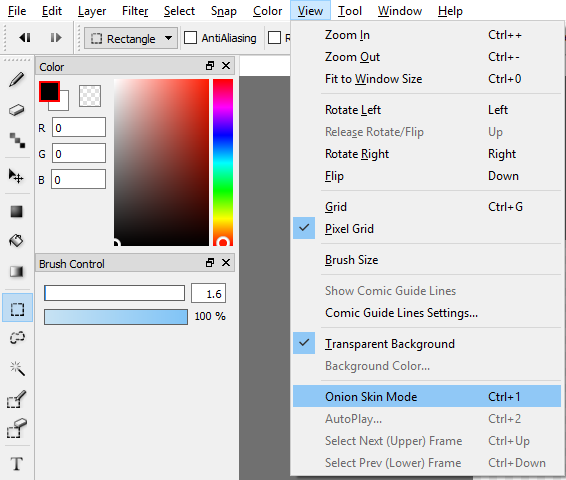
Now, you'll notice that in my screenshots, some of my tools have keyboard shortcuts you might not. Artists (should) rely on keyboard shortcuts to save on time. The less time you spend dawdling and finding tools is more time you can use to work on your art.
To set a keyboard shortcut, go to File > Shortcut Setting.
Okay. Now you've got an animation. How do you get it onto the web?
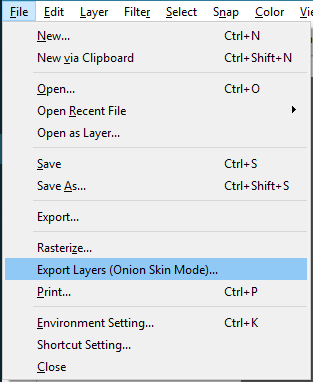
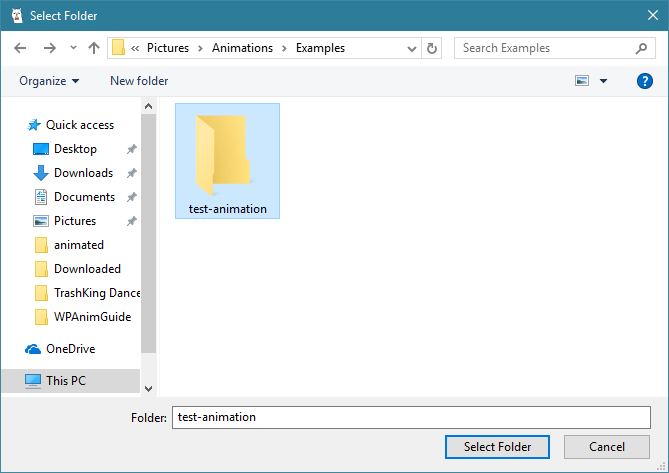
10 - Exit out of Autoplay. Select File > Export Layers (Onion Skin Mode). The Save screen will come up. Make a new folder and name it something memorable, like "test". Click into the folder, then press "Select Folder". When asked to open FireAlpaca Douga, select "Yes".
11 - Once you're on the website, scroll down a bit and click "Select all files". Navigate to where you saved your animation. Once all your files have been loaded, scroll down a bit more. Adjust framework speed to your desire. You might want to uncheck "Insert FireAlpaca logo" so you don't get that hideous alpaca on your new masterpiece. Then select "Create!" then "Download", then "Download" again.
12 - Name the image something memorable, then save it where you'll easily find it. Once you've saved it, simply upload it to an image host such as PostImages or Imageshack. Share link as necessary.

Thanks for reading.
**Most animations are made in similar ways in different graphics programs. You just have to figure out what way works best for you.
page dividers can be found at Thomashir.deviantart.com


